peter (admin) -

Running Multiple Containers Inside a Kubernetes Pod
Introduction
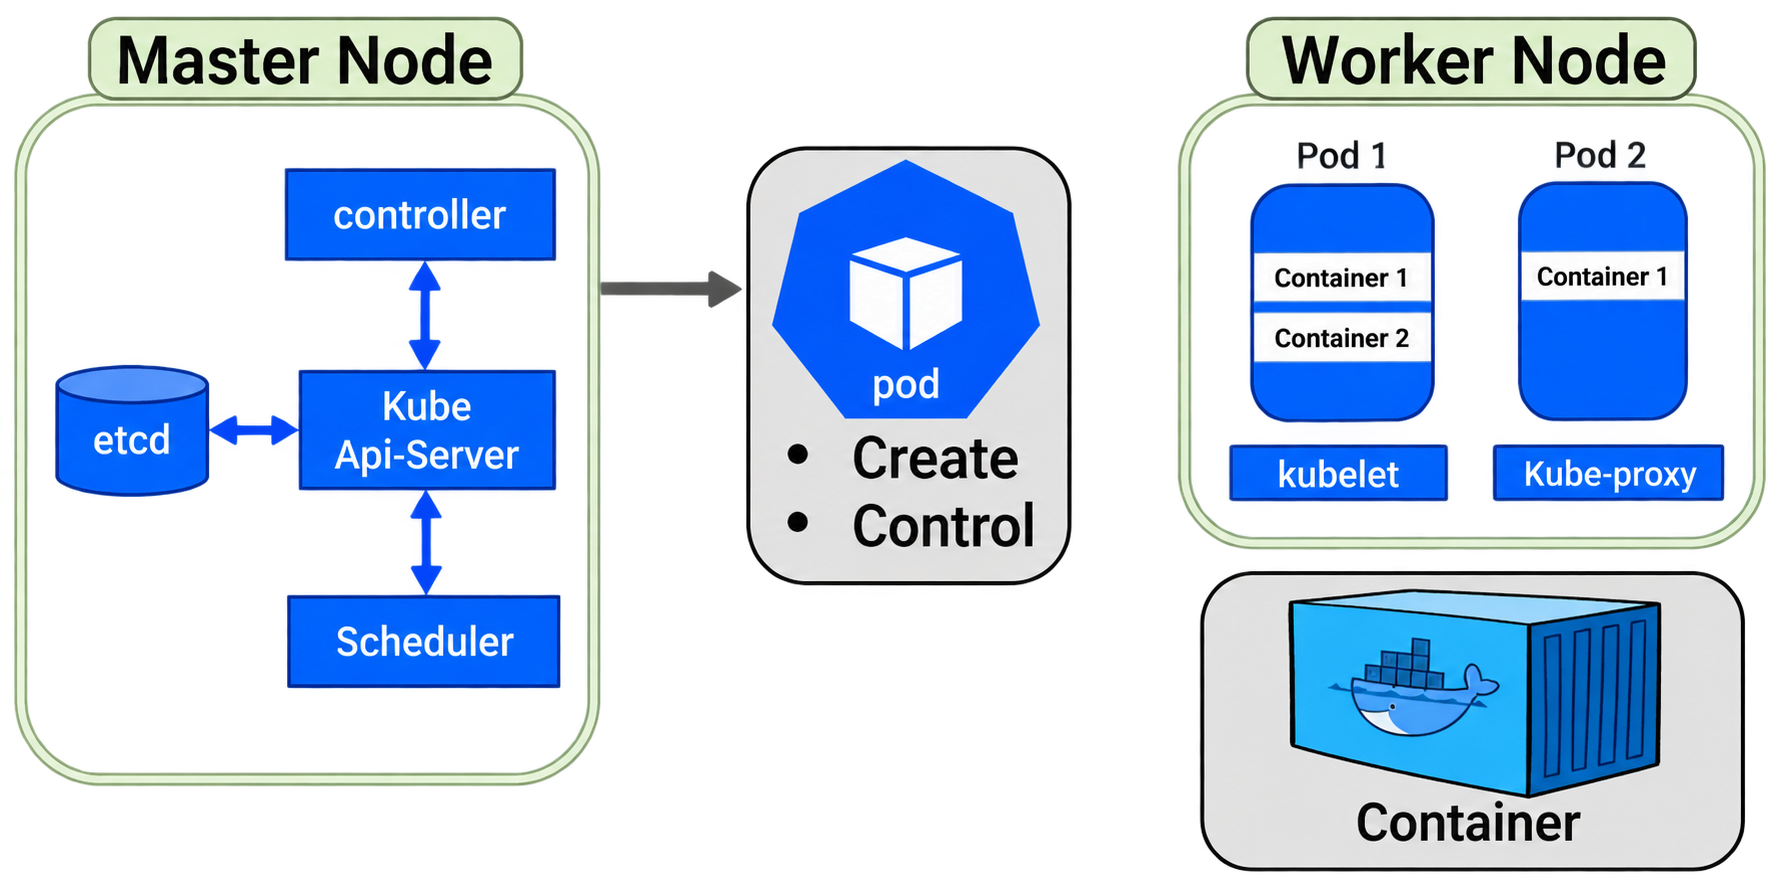 Here we will learn how containers run and communicate inside a single Kubernetes Pod.
We will also learn how multiple containers interact with each other. Containers can share networking and storage while still running as separate processes.
For this exercise, we are already logged into both the control-plane node and the worker node because we need to manage Kubernetes resources from the control plane and verify container-level behavior directly from the worker.
The control-plane node is used to create and manage the Pod, while the worker node is where the containers actually run. Accessing both machines therefore allows us to examine the complete process.
Creating a Multi-Container Pod with YAML
We will use YAML because it allows us to define the complete Pod configuration in a clear and structured way.
YAML makes it easier to create multi-container Pods and specify detailed settings that would be cumbersome to provide using individual command-line options.
This also reflects common Kubernetes practice, where applications and resources are generally defined using configuration files.
For this exercise, however, we can write the YAML directly in the terminal and pipe it into kubectl.
We start with the cat command and a here document:
cat <<EOF
The < syntax starts a here document. The shell continues reading everything we enter until it encounters another EOF on a line by itself.
The pipe symbol:
|
takes the output generated by cat and passes it directly to kubectl.
The command:
kubectl apply -f -
tells kubectl to read the YAML configuration from standard input rather than from a saved file.
This allows us to write a YAML configuration directly in the terminal and immediately apply it to the cluster.
Defining the Pod
Defining the PodAt the beginning of our YAML configuration, we specify:
apiVersion: v1
kind: Pod
apiVersion: v1 tells Kubernetes that we are using the core API version.
kind: Pod tells Kubernetes that the resource we want to create is a Pod.
Inside the metadata section, we give the Pod the name:
metadata:
  name: dual-container
The name dual-container identifies this Pod inside its namespace.
Selecting the Worker Node
Selecting the Worker NodeInside the spec section, we define how the Pod should behave.
For this exercise, we include a node selector so that Kubernetes schedules the Pod specifically onto the k8worker node.
For example:
nodeSelector:
  kubernetes.io/hostname: k8worker
This ensures that we know exactly which node is running the Pod when we later inspect its containers directly from the worker.
Defining Two Containers
Defining Two ContainersUnder the containers section, we define two separate containers inside the same Pod.
The first container is named web and uses the NGINX image:
- name: web
  image: nginx
NGINX provides a simple web server and represents the main application container in this example.
The second container is named helper and uses the BusyBox image.
BusyBox is a lightweight Linux image containing useful commands such as sh, echo, and sleep.
The helper container runs a shell loop that prints the word helper every five seconds.
For example:
- name: helper
  image: busybox
  command:
    - sh
    - -c
    - while true; do echo helper; sleep 5; done
The loop keeps the helper container running continuously and gives us something we can observe through its logs.
Complete YAML Example
Complete YAML ExampleOur Pod definition therefore looks similar to this:
peter@k8s-master:~$ cat <<EOF | kubectl apply -f -
apiVersion: v1
kind: Pod
metadata:
  name: dual-container
spec:
  nodeSelector:
    kubernetes.io/hostname: k8s-worker1
  containers:
    - name: web
      image: nginx
    - name: helper
      image: busybox
      command: ["sh", "-c", "while true; do echo helper; sleep 5; done"]
EOF
pod/dual-container created
This configuration creates one Pod containing two containers:
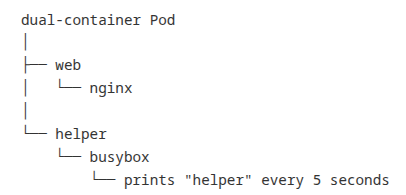
Both containers live inside the same Pod.
They share the Pod's network namespace, which means they can communicate with each other using localhost, while still running as separate container processes.
After applying the configuration, Kubernetes should report that the Pod has been created or configured.
This means the YAML configuration was accepted and Kubernetes can begin scheduling and starting the Pod according to the settings we provided.
Because of our node selector, the Pod should be scheduled onto k8worker.
Examining the Multi-Container Pod
Examining the Multi-Container PodWe can examine the Pod in detail using:
kubectl describe pod dual-container
The output provides information about both containers.
The first container is:
web
and uses the NGINX image.
The second container is:
helper
and uses BusyBox.
The helper container runs its background loop and prints:
helper
every five seconds.
Because both containers belong to the same Pod, they run on the same worker node and share the same Pod network.
Examining Pod Events
Examining Pod EventsAt the bottom of the kubectl describe output is the Events section.
The events show the steps Kubernetes performed while starting the Pod.
Kubernetes first schedules the Pod onto k8worker.
The kubelet and container runtime then prepare the required images and containers. The NGINX container is created and started, and the BusyBox helper container is also created and started.
This demonstrates that Kubernetes has successfully launched multiple containers inside a single Pod.
The helper container performs its background task while NGINX provides the web server functionality.
Viewing the Helper Container Logs
Viewing the Helper Container LogsBecause our Pod contains more than one container, we specify which container's logs we want to see.
To view the helper container logs:
kubectl logs dual-container -c helper
The output should contain repeated messages:
helper
helper
helper
helper
This confirms that the BusyBox container is continuously executing the loop defined in our YAML configuration.
We can also follow the output continuously:
kubectl logs -f dual-container -c helper
The -f option follows the log as new messages are generated.
Examining the Pod from the Worker Node
Examining the Pod from the Worker NodeNow we move to the worker node to examine the Pod at the container-runtime level.
Run:
sudo crictl pods
crictl communicates with the container runtime through the Container Runtime Interface (CRI).
The command displays the Pod sandboxes known to the container runtime on that particular worker node.
A Pod sandbox is the runtime environment created for a Pod that provides shared resources such as its network namespace.
The output should contain:
dual-container
in the deep namespace with a state of:
READY
This confirms that the Pod is active on this worker node.
You may also see older Pod sandboxes marked as NOTREADY. These represent sandboxes that are no longer active but may still be visible to the runtime until they are cleaned up.
This output verifies that our multi-container Pod exists at the container-runtime level on the worker node.
Viewing the Actual Containers
Viewing the Actual ContainersWe can now examine the individual containers running on the worker:
sudo crictl ps
Whereas:
sudo crictl pods
shows Pod sandboxes, crictl ps shows the individual containers managed by the container runtime.
For our Pod, we should find two containers:
web
helper
Both should have a state of:
Running
The web container is running NGINX, while the helper container is running BusyBox and executing our loop.
This confirms that dual-container is not simply a Kubernetes configuration object. The Pod has been scheduled onto the worker node and both of its containers are actively running through the container runtime.
How the Components Fit Together
How the Components Fit TogetherThe complete relationship can be represented as:
Kubernetes Cluster
       |
       v
dual-container Pod
       |
       +-------------------+
       |                   |
       v                   v
  web container       helper container
     NGINX               BusyBox
       |                   |
       |             background loop
       |             prints "helper"
       |
       +---------+---------+
                 |
          Shared Pod Network
                 |
             localhost
The important concept is that a Pod is the unit that Kubernetes schedules onto a node.
Containers within that Pod run as separate containers, but they share important Pod-level resources. In particular, containers in the same Pod share the same network namespace and can communicate with each other through localhost.
This makes multi-container Pods useful when closely related processes need to work together as a single application unit.
Comments (0)
There are no comments yet. Be the first to comment.
Log in or register to leave a comment. all comments are subject to admin approval