peter (admin) -

Deploying a Sample NGINX Application on Kubernetes
Now it is time to deploy a sample application on our Kubernetes cluster to verify that everything is working correctly.
For this example, we will use NGINX, a popular web server used to serve web pages and handle HTTP requests.
Creating the NGINX Deployment
To deploy NGINX, we use the kubectl create deployment command:
kubectl create deployment nginx --image=nginx
This tells Kubernetes to create a Deployment named nginx using the official NGINX container image.
After running the command, Kubernetes immediately begins working in the background.
First, Kubernetes creates a Deployment object. The Deployment manages the desired state of our application and, through a ReplicaSet, ensures that the required number of Pods are running.
The Deployment creates a ReplicaSet, which then creates a Pod. Inside that Pod, Kubernetes starts an NGINX container using the specified NGINX image.
The process looks roughly like this:
Deployment
    |
    v
ReplicaSet
    |
    v
   Pod
    |
    v
NGINX Container
The Kubernetes scheduler determines which available node should run the Pod.
In our setup, the NGINX Pod is scheduled onto the worker node. Control-plane nodes are normally protected from general application workloads by a scheduling taint, leaving worker nodes to run application workloads.
If the NGINX image is not already available on the selected node, the container runtime downloads it before starting the container.
Kubernetes then continuously monitors the application. If the Pod fails, the Deployment and ReplicaSet controllers work to restore the desired state by creating a replacement Pod.
Checking the Deployment
We can verify that the Deployment was created with:
kubectl get deployments
We can also check the Pod:
kubectl get pods -o wide
The -o wide option provides additional information, including the node on which the Pod is running.
For example:
NAME                     READY   STATUS    NODE
nginx-xxxxxxxxxx-xxxxx    1/1     Running   k8sworker1
A Running status confirms that the NGINX container has started successfully.
Exposing NGINX Outside the Cluster
At this point, NGINX is running inside the Kubernetes cluster, but we want to make it accessible from outside the cluster.
To do this, we expose the NGINX Deployment using a Kubernetes Service.
For this example, we create a Service of type NodePort:
kubectl expose deployment nginx --type=NodePort --port=80
NGINX listens for HTTP traffic on port 80.
The NodePort Service provides an externally accessible port through which traffic can reach the NGINX application.
The traffic flow can be represented as:
Client
  |
  v
Node IP : NodePort
  |
  v
Kubernetes Service
  |
  v
NGINX Pod : 80
After running the command, Kubernetes should report:
service/nginx exposed
This confirms that the Service has been created.
Viewing Kubernetes Services
We can now list the Services in the cluster:
kubectl get svc
The correct abbreviation is svc, rather than sv.
The output may look similar to:
NAME         TYPE        CLUSTER-IP      EXTERNAL-IP   PORT(S)        AGE
kubernetes   ClusterIP   10.96.0.1               443/TCP        22h
nginx        NodePort    10.110.79.156           80:32589/TCP   28s
The first entry is the built-in kubernetes Service. This provides an internal endpoint for accessing the Kubernetes API server.
Our nginx Service has the type:
NodePort
which means Kubernetes has allocated a port from the NodePort range.
Understanding the Port Mapping
Suppose the NGINX Service displays:
80:32589/TCP
The first number:
80
is the Service port.
The second number:
32589
is the NodePort allocated by Kubernetes.
Traffic arriving at the NodePort is directed through the Service to one of its matching NGINX Pods.
The Service ultimately sends the request to the NGINX application listening on port 80.
Accessing the Application
Suppose our worker node has the IP address:
192.168.2.98
and Kubernetes assigned NodePort:
32589
We can access the application using:
http://192.168.2.98:32589
We can either enter this address into a web browser or test it from a terminal using curl:
curl http://192.168.2.98:32589
When the request reaches the cluster, the NodePort Service routes it to the NGINX Pod.
NGINX then processes the HTTP request and returns its default web page.
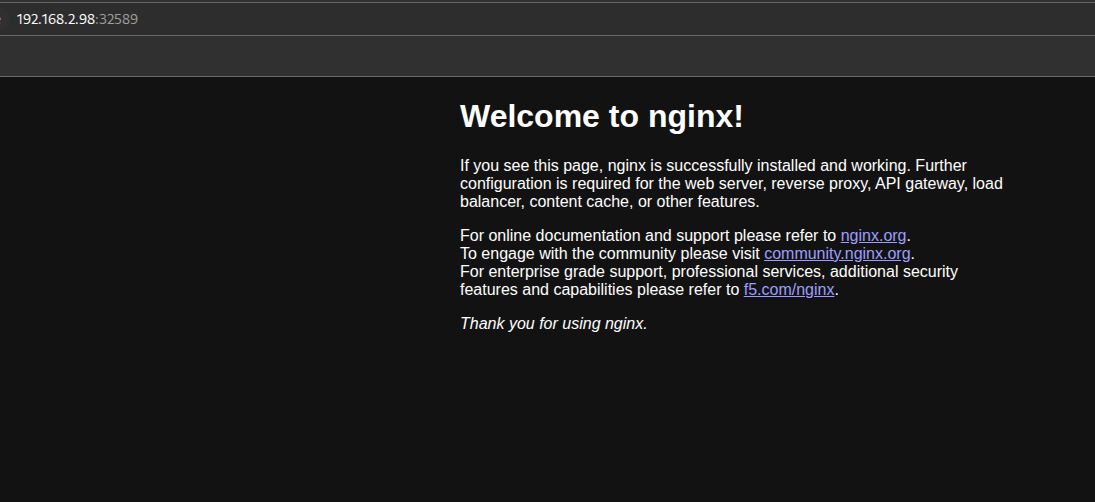
Verifying NGINX in the Browser
Open a web browser and enter:
http://192.168.2.98:32589
If everything is configured correctly, the browser should display the standard:
Welcome to nginx!
page.
This confirms that several important parts of our Kubernetes cluster are working correctly:
-
The NGINX Deployment was created successfully.
-
The ReplicaSet created the required Pod.
-
The container runtime successfully started NGINX.
-
Kubernetes successfully scheduled the Pod onto a node.
-
The Kubernetes Service is working.
-
The NodePort is accessible.
-
Pod networking is functioning.
-
Traffic can reach the NGINX application.
Our Kubernetes cluster is therefore successfully running and exposing its first application.
Noteworthy Comment
Because our nginx Service is a NodePort:
nginx NodePort 10.110.79.156 80:32589/TCP
we can normally access NGINX using the IP address of any Kubernetes node with port 32589.
For example, if we have:
master    192.168.2.98
worker1   192.168.2.99
worker2   192.168.2.100
then all of these should work:
http://192.168.2.98:32589
http://192.168.2.99:32589
http://192.168.2.100:32589
It doesn't matter which node contains the NGINX Pod
Suppose:
kubectl get pods -o wide
shows NGINX actually running on worker2.
You should still be able to connect through:
Client
   |
   | :32589
   v
worker1
   |
   | Kubernetes Service networking
   v
worker2
   |
   v
NGINX Pod :80
Kubernetes routes the request to an appropriate NGINX Pod.
Don't use 10.110.79.156 from your normal PC
This address:
10.110.79.156
is the ClusterIP and is normally only reachable from within the Kubernetes cluster.
For access from your LAN, use:
:32589
You can see your node IPs with:
kubectl get nodes -o wide
For example:
NAME       STATUS   INTERNAL-IP
master     Ready    192.168.2.98
worker1    Ready    192.168.2.99
worker2    Ready    192.168.2.100
Then try:
curl http://192.168.2.98:32589
curl http://192.168.2.99:32589
curl http://192.168.2.100:32589
All three should normally return the NGINX page. If it works through one node but not another, that's worth troubleshooting because it usually indicates a firewall, kube-proxy, CNI, or routing problem.
Comments (0)
There are no comments yet. Be the first to comment.
Log in or register to leave a comment. all comments are subject to admin approval